Showing posts with label cooking. Show all posts

Friday, 13 September 2024

The Secret of Cooking ~ Recipes for an Easier Life in the Kitchen ~ Bee Wilson


Never before have a I met a cookbook with so much anticipation as this one. I had read reviews and such and even looked at other Bee Wilson books too, which all have been added to my book list. Bee Wilson is a food writer and journalist. She writes a column for the Wall Street Journal called "Table Talk" and campaigns for food education with the charity TastEd. 

The Secret of Cooking, Recipes for an Easier Life in the Kitchen, is designed to discuss technique, ingredients and tools to help ease and navigate around your kitchen and everyday cooking. Among the thoughts on how to cook, whether alone, with children or just too tired there are 104 recipes that offer clever tips and advice on cooking, seasoning, cleanup and equipment. This cookbook speaks to the home cook and any possible trepidation one might have in their own kitchen. Speaking for myself, I am well versed around my kitchen, however I will take or read any advice or insight to help me reiterate that because let's face it sometimes and even at the best of times we may ponder our abilities in the kitchen, especially around holidays and gatherings, when so much goes into sharing and even when viewing online cooking and baking videos. Bee Wilson is ultimately reimagining everyday meals and cooking by bringing back that culinary spark which may have faded. 

Apart from the Introduction, I adore how the chapters are titled with a statement sentence, like Cut yourself some slack and Treat time as an ingredient, rather than a one word headline. The recipes include her acclaimed Adaptable Âsh, a Red Curry Sauce, simplest Chicken Stew, 7 ways to cook a Carrot, Zucchini and Herb Fritters, a Grated Tomato and Butter Pasta Sauce, and an all-purpose curry powder; plus desserts... which are universal, gluten free and diary free like the Vegan Pear, Lemon, and Ginger Cake. This is one cookbook which the majority of the recipes will make the rounds multiple times in our kitchen. To find out more information on this cookbook and other Bee Wilson books, visit  her website, beewilson.com. 

I will share the delicious and straightforward recipe of Chana Masala from the cookbook... 


Ten - Minute Chana Masala

----------------------------------------------------------------------------------------

By using green onions instead of regular yellow onions and fresh tomatoes instead of canned, you get a full-flavoured chana masala (Indian chickpeas) on the table in under 10 minutes. I would happily eat this for lunch every day, and leftovers are good for breakfast with a fried egg.

Serves 2


2 tablespoon oil

4 green onions, trimmed and chopped

2 cloves of garlic, peeled and grated 

3/4 - inch/2cm piece of ginger, grated

9oz/250g fresh tomatoes, rinsed and blitzed with an immersion blender

1 tablespoon tomato paste

1 teaspoon garam masala 

1/4 teaspoon ground turmeric 

1/4 teaspoon Chile flakes

1 x 15 oz/425g can of chickpeas, drained


In a wide sauté pan or fry pan, heat the oil and cook the green onions until just softened - 1 minute. Add the garlic and ginger and cook for 1 minute more, then add the tomatoes and tomato paste plus 1/2 teaspoon salt. Simmer for about 2 minutes, then add the apices and chickpeas and simmer for a couple of minutes more or until the sauce is thick and delicious. Check for seasoning.

Serve with flatbreads and cool yoghurt or on hot buttered toast. 


Tuesday, 24 August 2021

Food Photo of the Day ~ Chicken Stir-Fry


With a few ingredients my daughter created this chicken stir-fry for dinner. I helped wash and chop some of the vegetables and prep the chicken, totally being under her direction. It was an exceptionally tasty meal and we wish we could have this every night. An enjoyable, relaxing time well spent in the kitchen with her. - JD 
   

Wednesday, 5 June 2019

Oven Baked Bacon


I am finding that there may be a few ways on how to achieve the ultimate cooked bacon. My son had watched a video on how to cook bacon in the oven and was describing the method of such. I have cooked bacon in the oven before however never covered the tray. Covering does change things and although I did not use wire racks, supposedly like the video did, to allow the bacon grease to drip; I am fine with that because I am all about curbing ones cleaning and washing up. 

Quite simply preheat the oven to 400ºF, take a baking tray and line the bottom and sides with aluminum foil. Place the bacon on the prepared baking tray. Cover with more aluminum foil and place the tray in the oven and allow to cook for 15 to 25 minutes or until crispy, checking after 10 minutes and turning once. Cooking time depends on how many slices you are baking and how you like your bacon cooked. Remove bacon slices that are cooked sooner to drain on a plate lined with kitchen towel (paper towel).  

I found that this is an easier way to cook bacon as there was little clean up and no greasy mess. Just allow the grease to cool then careful roll the foil, from the baking tray into a ball and place in the garbage. This also allows one to utilize the stove top, get on with prep work, wash dishes or do something else while the bacon is in the oven.  


Hope everyone is having a good week. - JD     

Thursday, 17 May 2018

Food Photo of the Day ~ Crispy Bacon


I remember reading an article, a few months ago, on how to make bacon more crispy when cooking. The article state, that adding just enough water to cover the bottom of the pan while the bacon cooks would result in a more crisper slice of bacon. No complicated ingredient or specialized pan... just add a bit of water. Simple. 

So the next time I was cooking bacon I thought I would test this culinary tip and sure enough I got nice crispy bacon. Nothing blackened or burnt. I am glad I gave this tip a try and now I am passing it on to you, to try, if you wish.  


Hope everyone is having a lovely week. Plenty of sunshine here in E-town with temperatures on the rise.  - JD  

Friday, 25 November 2016

The Breakfast Cereal Gourmet


Since I featured the cornflake squares the other day I thought it was very fitting to feature this cookbook. Seemingly, a bowl of cereal is mostly consumed in the mornings before one is dashing off to start their day. Perhaps a weekend bowl while reading the news or watching TV, or a cereal snacker throughout the day. Cereal can enjoy it's place on the comfort food list.  

Much has changed in the world of breakfast cereals since it's introduction many years ago; including it's ingredients, consuming, and marketing. The notorious Cereal Café in London is not only a sign of the times; it proves breakfast cereal has a mainstream consumption and following and it is not just for breakfast anymore. Throughout the years cereal has been baked, twice baked, shredded, squared, granolaed, sugared, marshmallowed, healthier, sweetened, nutted, dried fruit and coconut added, seeded, fibre added, and vitamin and protein laden. One might say that throughout the years, cereal has been put through the mill! 

This cookbook is not disproving what cereal has become but rather to look outside the box; so that it may be enjoyed in everyday cooking and or baking. Cereals crunchiness makes it an ideal as a crust, topping, layer, stuffing or coating. Crushed or ground, cereal can work great as a substitution for flour, breadcrumbs, nuts, or cornmeal. Cereal just may give food great texture and change foods taste in interesting ways. Offering 31 recipes, from restaurants, chefs, and authors across America at the time of printing, a few caught my eye. Asian Grilled Chicken Salad, Curried, Pilaf, Hazelnut Chicken with Mustard Sauce, Caramelized Onion Tart, Black Bean Burger, and Peanut Butter Krispy Cocoa Chews.

The cookbooks heavy thick cardboard covers remind me of a box of cereal. Pages are adorned with retro pictures of cereal boxes and adverts. There are interesting facts and bite sized cereal history details to marvel at... and yes the first use of cereal on the culinary map was the rice krispie treat! 

Here is a lovely recipe to try...  


Pan-fried Ricotta Cakes with Shaved Proscuitto and Herb-Almond Oil
------------------------------------------------------------------------------------------------------
Serves 6 

Ricotta Cakes:

2 1/2 cups whole-milk ricotta
1/2 cup finely ground Parmesan cheese
2 1/2 cups finely ground Rice Krispie cereal
2 cloves of garlic, finely chopped
4 egg yolks
Salt and black pepper
2 tablespoons extra-virgin olive oil
4 ounces finely sliced proscuitto

1. In a large bowl, place the ricotta, Parmesan cheese, 1/2 cup of the Rice Krispie cereal, and garlic and mix well. Add the egg yolks and season to taste. 
Form into 6 equal patties and dredge in the remaining Rice Krispie cereal. Chill until ready to use.

2. Julienne the proscuitto and refrigerate until ready to use. Reserve the olive oil until time to finish the dish. 

Herb-Almond Oil:

1/2 cup extra-virgin olive oil
2 tablespoons chopped fresh basil
1 teaspoon chopped fresh thyme
2 teaspoons chopped fresh parsley
1/3 cup toasted ground almonds
Sea salt 

In a blender or food processor, place the olive oil and herbs, and blend well. Add the almonds and salt, and set aside.

TO FINISH:

Heat a very large sauté pan with the reserved 2 tablespoons olive oil until very hot. Add the cakes and cook on each side until golden brown about 5 minutes. Remove the cakes from the pan and place each on a plate. Top with julienned prosecution and drizzle around the sides with the herbed-almond oil. Serve warm. 


Please note: When sharing a recipe from a cookbook I type it word for word, how it is written in the cookbook. There is a typo with the word Prosciutto, unfortunately it has been misspelt... the u has been put before the i, rather than after it. An unfortunate mis-print.  

Have a great weekend everyone! - JD 

Friday, 7 October 2016

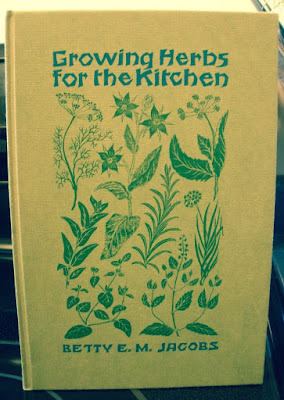
Growing Herbs for the Kitchen


I thought this was a special little book and it does read more like a reference text. It offers help to those wanting to try their hand at growing herbs in the garden or for those wanting a lovely herb window box.

Notable herbs are listed in alphabetical order. The usual herb suspects are there although some notorious ones as Borage, Catnep, Lemon Balm, Lovage, and Sweet Cicley make an appearance. A herb is dedicated to each page with a point form explanation detailing such as the botanical name, botanical family, life span, appearance, flavour, soil, position, propagation, germination, quality to grow, plant, culture and finally pots... whether the herb may be potted or window boxed. It really is a quick guide. The opposite page has a sketch of the featured herb. 

Unfortunately, there are no recipes however at the back of the book there is Climatic Information; telling how much cold, as in temperature, each herb can or will withstand. After that there is a table called Flavour Makes the Dish. The herbs are listed with a suggested food list. Which it also states not to use too many herbs together in one dish and a point to note... "One - half a teaspoon of dried herb is roughly equal to two teaspoons of the fresh chopped, and a quarter teaspoon of the powdered herb."

It is great if you have chosen your dishes for a meal and want to make each dish a savoury one. Choosing will help find what herb compliments best. Considering the book was published in 1972 a few things have changed involving the world of herbs and infused cooking... cross-over cooking, one might say, is one of them which means somethings in the culinary world are not written in stone. 

Since it is Thanksgiving weekend I am sure a central feast will be cooked in many kitchens across Canada. Here are this books herb suggestions for...

Turkey: Chervil, Garlic, Oregano, Parsley, Shallots, Sweet Marjoram, and Tarragon
  
Ham: Savoury

Vegetables: (in general): Basil, Chervil, Chives, Garlic, and Lemon

Potatoes: Chives, Chervil, Dill, Marjoram, Mint, Parsley, Sweet Cicely, and Thyme

Carrots (and other root vegetables): Chervil, Chives, Dill, Marjoram, Parsley, Sweet Cicely, and Thyme

Squash: Basil, Bay, Chervil, Dill, Marjoram, Oregano, Parsley, Savoury, Tarragon, and Thyme 

Peas: Basil, Chervil, Dill, Marjoram, Mint, Rosemary, Savoury, and Thyme


Looking forward to the long weekend. Have a great weekend everyone! - JD


Thursday, 2 June 2016

Vanilla

It has been awhile since I posted about a cookbook. Seeing how, cookbooks are how my blog got started; I feel befuddled how, at times, this idea goes amiss. Not for long however I do get side tracked and enjoy sharing my baking/cooking and recipes, which is also another premise of this blog. I have dearly missed my loose reviews, if you may call it that, of all things cookbooks. What better way to get back into the swing of things than to focus on such an ingredient as vanilla.

I have quite a few cookbooks that focus on one ingredient and they can be quite handy and offer inspiration as much as a reminder to not over look those certain ingredients. This cookbook wants to re-establish vanilla and showcase it's true versatility in baking and cooking. Yes, cooking! I was quite intrigued by the savoury recipes in this book. Now a days vanilla is more common and often comes to reference something ordinary or bland. Which is unfortunate because the aroma of vanilla itself may evoke memories of comfort and joy with just one hint. Probably because of this double edge sword, so to speak, the author wanted to bring about a more flavourful palate association with vanilla. Which this cookbook does. There are some fabulous recipes to try and be enjoyed. 

This is a lovely cookbook that anyone who will appreciate and revel in the comfort of vanilla, a pantry staple. Beautiful full page matte photographs. Great chapters with helpful hints, information and historic facts sandwiched throughout the book, which anyone may appreciate.  

As soon as I saw Elderflower I had to share this recipe. It simply sounds divine.  


Elderflower & Almond Cake
--------------------------------------------------------------------------------------
Serves 12

80 g (2/3 cup) self-raising/self rising flour
1 teaspoon baking powder
170 g (1 1/4 cups) ground almonds/almond meal
225g (2 sticks) softened butter
240g (1 cup plus 3 tablespoons) golden caster sugar/raw cane sugar
finely grated zest of 1 lemon
4 eggs, lightly beaten
160ml (2/3 cup) elderflower cordial (use the sort that needs diluting about 1:10)
freshly squeezed juice of 1 lemon
150ml (2/3 cup) mascarpone
150ml (2/3 cup) double/heavy cream
1 teaspoon vanilla paste, or 1 vanilla pod/bean, seeds only
a handful of chopped pistachios 

a 23cm/9 inch springform cake pan, greased and base lined with baking paper


Pre heat oven too 180ºC (350ºF) Gas 4.

Mix together the flour, baking powder, and almonds. In a separate bowl, cream the butter, 225g/1cup plus 2 tablespoons sugar and lemon zest until fluffy. Gradually beat in the eggs, one at a time, making sure that each one is incorporated before adding the next. Quickly beat in the flour mixture, then spoon into the prepared pan and smooth the top. Bake for 40 - 45 minutes, or until risen and golden.

While the cake is baking, combine 100ml/scant 1/2 cup of the elderflower cordial with the lemon juice and remaining sugar. Remove the cake from the oven, then prick it all over and sprinkle the syrup over the surface, guiding the liquid towards the holes. Leave to cool in the pan, then remove.

Put the mascarpone in a bowl with the remaining elderflower cordial and whisk until smooth. Add the cream and vanilla paste or seeds and whisk again to make a softly spreadable icing/frosting. Spread the icing/frosting over the top of the cooled cake and scatter with the chopped pistachios


And there was this savoury recipe great for breakfast or brunch and dinner. 


Sweet Potato Pancakes with Cinnamon and Vanilla
-------------------------------------------------------------------------------------------
Serves 4 - 6 

300 g/10oz. sweet potato, peeled and chopped
125g (1 cup) plain/all purpose flour
1 teaspoon baking powder
1 teaspoon ground cinnamon
3 - 4 teaspoons caster/superfine sugar
1 tablespoon vanilla extract
125ml (1/2 cup) of milk
1 beaten egg
1 tablespoon butter, melted and slightly cooled
vegetable or groundnut oil, for frying
yogurt, stewed apples and maple syrup, or vanilla ice cream, to serve.


Bring a pan of water ti the boil and steam the sweet potatoes until tender, then drain and leave to cool. Meanwhile, sift the flour, baking powder and cinnamon into a large mixing bowl. Stir in the sugar. Add the vanilla extract to the milk and egg, along with the melted butter.

Gradually add the wet ingredients to the dry., combining it all together with a fork. The batter can be made up to 24 hours in advance and stored in the fridge in a bowl, covered, if you like.

Before cooking, mash the sweet potatoes, then stir them through the batter until well combined. Melt a little oil in a non-stick frying pan/skillet over fairly high heat. Once hot, carefully add heaped tablespoons of the batter. Gently fry until golden brown on both sides, turning them with a spatula.

Serve stacked with yogurt, stewed apple and maple syrup, either for a hearty breakfast that kids will love, or with vanilla ice cream for dessert.


Vanilla Facts:
----------------------------------------------

- The Totonac people of Mexico considered vanilla as a gift from the Gods.

- The Aztec's combine chocolate and vanilla together which seduced the Spanish conquer Hernan Cortés. He is credited with introducing chocolate and vanilla to Europe in the 1520's .

- The first written reference to the word vanilla appeared in an Amsterdam publication by William Piso in 1658.

- In 1601, when it was declared by Hugh Morgan, apothecary to Queen Elizabeth I, declared that vanilla should be used as flavour, she insisted that vanilla be used in practically everything she ate.

- By the 18th century vanilla was so popular in France that it became a commodity grown in French colonies.

- It was the The Marquis of Blandford,  later the 5th Duke of Marlborough, that imported vanilla to Britain in the late 18th century.

- Vanilla is now grown in Madagascar, the Philippines, Indonesia, India, Tahiti, the West Indies, and also many countries within Africa.

- Vanilla is the second most expensive spice after saffron. 


Hope everyone is having a good week so far. - JD 


Friday, 6 November 2015

Bannock

As most of you know last night was Bonfire Night and we had a bonfire feast of chilli, bannock and oven roasted cauliflower and onions. I have made bannock before for Robert Burns night and thought it would be perfect last night. Traditional Selkirk bannock has sultanas and mixed peel added however there are other variations like adding blueberries or raisins or cranberries or cinnamon. Bannock may be formed into one circular shape or into a loaf pan and baked in the oven. It also can be cooked in a cast iron skillet over a campfire or wrapped around a stick. This bannock recipe is very easy and quick therefore I opted for a more simple in house method using a frying pan and the stovetop range. It doesn't have to be Bonfire Night for you to enjoy bannock; it can be made for breakfast just serve with jam.        

BANNOCK
--------------------------------------
Makes 4. Serves 2 - 4. 

1 cup all-purpose flour
1 teaspoon baking powder
1 tablespoon British mixed spice
1/4 teaspoon salt
3 tablespoons unsalted butter
1/2 cup water

In a large bowl, combine flour, baking powder, British mixed spice and salt. Cut in the butter until the mixture resembles a coarse meal. Add 1/2 cup water and stir until flour is moistened and a stiff dough forms. Add more water if necessary.

Lightly oil and preheat a large cast iron or nonstick frying pan/skillet over medium heat.

Turn dough onto lightly floured board or counter. Divide into 4 equal pieces. Flatten each piece to form a disc 1/2 inch (1 cm) thick.

Place first disc in hot skillet and cook for 6 to 7 minutes per side. Serve warm with butter. 

Notes: I did add a bit more water, only adding a tablespoon at a time, to bring the dough to the desired consistency.  

Friday, 21 March 2014

Copper Wok


To ease my love of all things copper my husband found this wonderfully priced wok for me. And I am certainly grateful. Seeing how our other wok was showing a considerable amount of wear and tear. I was a bit apprehensive regarding the stainless steel interior however after many uses food sticking is not a problem. Cleaning is a breeze. The most important thing is heat. The heat is even and is retained very well when using this wok. This is my third copper piece of kitchenware and I am very please. 

Have a good weekend everyone! - JW 

Thursday, 20 February 2014

Edwardian Glamour Cooking ~ Without Tears


Now that Downtown Abbey has started up again and most of us are into the thick of it, I found this cookbook in my collection. It is only 61 pages and gives you a glimpse at Edwardian cooking, glamour or not. The book mostly concentrates on savoury dishes and technique. There are no lavish desserts because according to the book there are no short cuts to recreating them. Even though this book was printed in 1960 the recipes have been fused with other recipes. To make a more simpler collection and have the cook contending with less prep time. Therefore seemingly bringing a more relaxed attitude to the Edwardian dinner table. Some recipe ingredients have been substituted for more common... accessible ones. With that being said, all the Edwardian epicurean delights may be brought back to life... without tears.    

Tools of the Edwardian kitchen - the pestle and mortar, the mixer, and the moulds. Serving hot or serving cold and decorations. The Edwardians luved to garnish! Thinking upon the modern day kitchen one has not strayed too far in that aspect. Some of the recipe names are worth pondering, like... Haddock Honeymoon, Chartreuse of Hare, Hot Egg Sandwiches,  Maharajah Morsels, Sefton Bloaters, and The Sultan's Cream of Chicken. And let us not forget the Aspic Jelly. 

If anything this cookbook is charming and is a nice addition to my collection.  

Hope everyone is having fun inside and outside of the kitchen. This week has certainly been a busy one for me! - JW 

Tuesday, 26 March 2013

The Zucchini and Carrot Cookbook


"Zucchini and carrots are truly the prodigal vegetables - yielding profusely, lavishly abundant." I couldn't agree more with that sentence from this cookbook. 

The first time I was introduced to zucchini was when my mum would make a chocolate zucchini loaf every now and again. However I do not think I fully appreciated her efforts. My idea of a sweet loaf was different. Vegetables were not dessert let alone mixed with chocolate. It wasn't the most anticipated combination. Now I find myself reminiscing about that very chocolate zucchini loaf. When I found this cookbook, I was scouting the aisles at Goodwill, I like to check all avenues old and new in search of cookbooks. My reminiscing became reality.  

The Zucchini and Carrot Cookbook by Ruth Conrad Bateman, 1976, covers just about everything imaginable in regards to recipes having zucchini and carrots as the main ingredient. The Good Cooking Ways is the first chapter and has tips on how to buy, ways to cook and zucchini and carrot sizes. The other chapters are 2) Lively Appetizers and Soups, 3) Omelets, Quiches and Casseroles, 4) Light-Touch Main Dishes, 5) Cool Salads, Relishes, and Pickles, 6) Breads and Spreads, 7) Cakes, Pies, Pudding, and Cookies and finally the 8th chapter Good Neighbour Recipe Exchange. This book really runs the gamut. There are some unusual... I say unusual however I mean more unique recipes. Like the Carrot Marmalade, Carrot Lemon Pie, Carrot Peanut Butter Spread, Almond Carrot Macaroons, Sautéed Zucchini Vermouth and Zucchini Cheese Pancakes. There are no glossy colour photos just a black and white illustration placed here and there. 

At any given time I always have a plenty of carrots on hand. Zucchini less so. So it was no surprise when I made the Tropical Carrot Cake from the cookbook. I also had some fresh pineapple on hand too. So it was meant to be. I omitted the the walnuts and added fresh orange zest instead.   
     

The recipe stated to icing the cake with a cream cheese icing. Unfortunately I had no cream cheese. Instead I added about a cup of icing sugar into a bowl and squeezed the juice from one organic orange over top of the icing sugar, then I mixed the juice into the icing sugar. Adding more icing sugar to get a some what thick but not too thick consistency. When complete I spooned the icing over the top in circles. Creating more of a thick drizzle.   


Ready to serve and ready to be eaten! This was how I plated it. I hope everyone had a good weekend. - JW 

Wednesday, 26 September 2012

Culinary Tales ~ Below Stairs


I finished reading this memoir from Margaret Powell. The book is an autobiography and she recalls moments in her life before, during and after working in domestic service. Throughout it's 209 pages Powell's personality comes through, witty and ever so feisty. I really enjoyed reading this book because you can understand how things used to be and appreciate how things are today in the kitchen. Unfortunately there are no recipes in this book. She did two follow up books: Climbing the Stairs and The Treasure Upstairs. She co-authored three novels and also did The Margaret Powell Cookery Book. I would definitely like to add that cookbook to my collection. - JW       

Tuesday, 25 September 2012

Chicken Tomato Pesto Pasta


Now if saying that isn't a mouthful then I don't know what is. I made this the other night. It was quick and easy... providing you have some left over roasted chicken in your refrigerator. Sometimes you need something quick!  

First I cooked the pasta, according to the package and then drained the spaghettini. A tip on draining pasta... don't complete drain all the liquid off, leave the pasta with a little bit on makes it easier for sauces to coat the pasta. Since I was cooking for five people I transfered the drained pasta into a large bowl. Once in the large bowl I added some already prepared low salt tomato pesto, enough to coat all the pasta. Added a few lugs of olive oil. Some pepper, paprika and chives. Making sure that the pasta gets coated well. Then I added the diced roasted chicken. I saved the parmesan cheese to be added at the dinner table just in case someone didn't want any.

Simple if you have a few things on hand. A great way to use left overs. I know I used a prepared pesto sauce however we are all pressed for time and having that tiny jar was great. When using anything prepared I do try to get the healthiest of the bunch. Low salt, low fat, low sugar. I do read my labels. Something that I have taught my kidlets to do at a young age. There are many ways you can change this dish up. Adding different types of meat or soy, veggies, spices, oils and pastas. -JW     
   

Wednesday, 21 March 2012

Four Generations


This cookbook was given to me by my Dad. It looks as though it's been through the war and it probably has considering it was my Great Grandmother's. This homemade cookbook is 100 years old! Not only did my Great Grandmother use this book so did my Grandmother, his Mother, my Dad and now me. All the recipes have been typed out using a typewriter except for a few which have been hand written. Pages are filled with classic recipes and some to which I have never heard of. There are check marks and cross marks next to some recipes. Few handwritten notes.


All the recipes are still easy to read. She must have had a good typewriter and the paper is of very good quality, heavy and thick. All the recipes are typed on one side only. On the backside of each sheet is a faint imprint of a crest and these words that I can read by holding it up to the light: Superfine Linen Record, Made in Canada.


Mixed with the typed recipes are some handwritten ones as well. These pages look like they were very well used. It is unclear who's handwriting it is. It could be my Great Grandmothers or my Grandmothers. It is very delightful receiving a cookbook like this. - jw


Friday, 10 February 2012

Practical Cookery


Judging by the above photo you can tell this cookbook has been around. The Practical Cookery: A Collection of Reliable Recipes complied by Amy Atkinson and Grace Holroyd With An Introduction on Cookery by Gas; Nutt & Co Ltd, Leeds. pp. 214; ii-vii index. This book doesn't mention any other additions nor does it supply a date of publication. Research shows that this cookbook could pre date 1911. From what I see I might place it anywhere from 1903 to 1930. The first gas stove came about in the 1820's. Most of them being one offs, trial and error. James Sharp was the first person to patent the gas stove in 1826 and opened a gas stove factory by 1836. In 1851 at London's World Fair a gas stove was on display but it wasn't until 1880 that the gas stove became more mainstream. More trial and error and by 1910 the first enamel gas stove made it's debut, for better fit and easier cleaning in the kitchen. It was Swedish Nobel Prize winner Gustaf Dalén in 1922 that invented the highly acclaimed AGA cooker. Without getting too carried away we can suppose the rest is history...


This cookbook is a small addition to my collection and is interesting. It covers many recipes. Some that are used today and some... well.. that are possibly not being used so much. The recipes tend to list the ingredients and give a description on how to prepare and cook each dish. If you do want to cook or bake from this book you are relying heavily on the descriptions to guide you. There is no temperature or stove top setting to help you. Measurements are in ounces or pints. So you have to know your conversions and kitchen know how to figure it out for yourself. Which can make it fun or disastrous. I made the Scotch Pancakes or Drop Scones one morning for breakfast and they turned out delicious.

The book is divided into many sections from meat to vegetables, breakfast dishes, cakes to tarts, sweet sauces to jam/fruit jellies, egg to cheese dishes and on page 188 is a section called and I quote: "Invalid Cookery: Hints on Serving Food for Invalids." Those recipes include more than one recipes for Gruel, Raw Beef Tea, Mutton Tea, Arrowroot Pudding and Port Wine Lozenges. Just reading that makes me hope I will never be sick and have to endure such antidotes... except for the Port Wine Lozenges *wink*. Enjoy your weekend! -jw


Wednesday, 8 February 2012

Chicken Chili Con Carne

Like a good stew, chili is another hearty meal that doesn't get overlooked. I felt like Chili Con Carne over the weekend and within no time whipped this up to satisfy my insides. I will share my recipe with you. Keep in mind I have no recipe written down. And those are the best recipes. I have made this quite often. Chili is one of the easiest recipes to play around with.


First, in a stock pot brown 1 package of ground chicken and one chopped onion together in a tablespoon of olive oil. Add a pinch of salt and a dash of pepper. Stir occasionally so everything doesn't stick to the bottom of the pan. I then add two crushed and chopped cloves of garlic. Stir to combined. While the chicken, onions and garlic come together chop whatever veggies you have chosen. I chopped two medium carrots, half a green pepper and half of a yellow pepper.


When chicken is browned, making sure all the meat has been cooked through, and onions are tender and slightly transparent but not over cooked, add the raw veggies. Stir together and cook for a few minutes. Just until the raw veggies have soften. I do like my veggies to still have some crunch. You may also want to put a lid on your pot to enhance the cooking time of the veggies. At this time I add some paprika, about a tablespoonful or two. When things start smelling great and veggies are to your liking...


It is time to add the beans. I chose one tin of pinto beans, drained, one tin of black beans, drained and one tin of baked beans in tomato sauce. Add whatever beans you would like. Kidney beans work well too. When choosing tins of beans I look for the lowest in sodium and use those. You may also used dried beans. Even though I am attracted to the idea of dried beans my experience has left me fussing over them too much. Stir in the beans to combined and simmer a few minutes more.


Now it is time to add the tomatoes. I used two 796ml tins of low salt diced tomatoes. That's 28 fluid ounces. Purely for convenience sake. There is nothing wrong with using tin tomatoes. You could use half tin tomatoes and half fresh tomatoes or all fresh tomatoes. Stir until tomatoes are combined. Now it is time to add the chili powder and don't be shy here. It may seem like you are adding a lot but you need to season this dish well! I added... oh about 5-6 tablespoonfuls. I wasn't measuring I just added the chili powder until I felt it tasted and looked right.


After everything has been added to the pot. Let it simmer anywhere from a half hour to an hour. Letting the spices steep into the chicken, veggies and beans. Sometimes during this stage I add a few squares of 80% dark chocolate. It adds a bit of richness and works well with the spiciness of the chili. Your place should smell fantastic by this point. Your pot brimming with hearty goodness.


I serve my chili best with a piece of rustic cornbread. You may also add a dollop of sour cream and a tablespoon of grated cheddar cheese on top. - jw

Thursday, 2 February 2012

Curried Corn Muffins to Share


Yesterday I posted about the Some Like it Hot Cookbook. The lovely Ms. Givens from Trend Wisely asked me to post the Curried Corn Muffin recipe. I am sharing the recipe straight from the book. Just click on the photo to enlarge and read the recipe. Seeing this photo now makes me want to make the Rich Sweet Potatoes with a Kick. Happy baking! - jw

Wednesday, 1 February 2012

Sing it Sugar


This is a pocket-sized gem! The Some Like it Hot Cookbook (Hollywood Hotplates): 64 pages, first edition; 1996 by Abbeville Press. With that many pages I supposed it is easy to read this cookbook from front to back. Have a laugh or two and remember scenes from the movie. The food and drink recipes are creative and fun. The contents of the book are under six titles: Cocktail Party in Upper Seven, Dinner with Sweet Sue and Her Society Syncopators, Barbecue on the Beach, Dinner at the Cuban Roadhouse, Midnight Supper on the Yacht and Birthday Banquet for Spats. Anyone who has seen the movie will gather the references in the titles.


This cookbook has movie trivia, quotes and black and white photos from the film. I highly recommend this book for anyone who is hosting a dinner party. You certainly would have a blast creating from this book. I found the recipes easy to follow and most ingredients I already had on hand. I really want to make the Curried Corn Muffins, Shortbread Doubly Endowed with Ginger, Corsetless Cream Cheese Spread and Figs in Drag.


And some like it sweet... this is the Bang-up Banana Cake with Daphne's Naturally Blonde Frosting, I made! It was devoured by all respectfully *wink* -jw

Monday, 30 January 2012

Red Cabbage


Another favourite thing of mine is red cabbage. Red cabbage is high in Vitamin C, rich in Vitamin A and abundant in Vitamin E. The darker and brighter a vegetable the better. Even though I had found a recipe in one of my many cookbooks, the recipe I used was given to me over the phone. This person was very sure and keen on sharing their recipe with me. You will need: one red cabbage, two apples, two white onions, olive oil, red wine vinegar, sugar and salt and pepper to taste.

First you want to finely chop the cabbage, apples and onions. I used Gala apples, you may also use Granny Smith apples for more of a tart flavour. When finished chopping add about 2 tablespoons of olive oil to a large pot. Add a little salt and pepper. Start by putting a layer of red cabbage on the bottom, then follow with a layer of onion and then a layer of apples. Pour a tablespoon or two of red wine vinegar and a tablespoon of sugar, I used brown sugar, over the first set of layers. Repeat until all the cabbage, onion and apples are in the pot.

Your layers should look somewhat like this. With everything in the pot, simmer on medium high heat for an hour or two. Stir occasionally. Not letting it stick to the bottom of the pan. If juices run out add a bit more red wine vinegar. I supposed you could add some red wine to the pot, I did not. If you want the dish to be more sweet add more sugar. It's all personal preference.

When the house smells wonderful and everything has simmered down... remember the crunchy red cabbage and onion and the crisp apples... they have all come together. Stewed down into this yummy dish that is best served warm.


Have it with sausages, chicken or fish. It is a tasty side that will add colour and crunch to your meal.

Wednesday, 25 January 2012

Cooking Ode to Robbie Burns


If you have celebrated Robbie Burns Day you may have chosen one of the above menus... I preferred to celebrate the day by making Bannock.


What a fine plate of Bannock! Enjoyed by all.


And a Whisky Mac with Bannock. Enjoyed by a few.


Gae bring to me a pint o' wine
And fetch it in a silver tassie
That I may drink, before I go,
A service to my bonnie lassie.
- Burns