Showing posts with label dinner. Show all posts

Thursday, 14 August 2025

Sun-dried Tomato Pesto


Basil pesto has its exquisite herbaceous appeal however sun-dried tomato pesto or Pesto Rosso as it is known in most parts of Southern Italy, has a sumptuously sweet tangy flavour. This recipe has the addition of a few fresh oregano leaves to give a subtle herb hint and cashews were used instead of almonds or walnuts. Another breezy meal that is deliciously glorious and savoury, and even better the next day, if there are any leftovers.       


Sun-dried Tomato Pesto
-------------------------------------------------------------------------

1/3 cup unsalted cashew pieces
2 large cloves of garlic, roughly chopped
1 cup lightly packed fresh basil leaves
1 cup julienne style sun-dried tomatoes
5 - 6 fresh oregano leaves 
1/2 teaspoon salt
1/4 teaspoon black pepper
2/3 cup extra olive oil
1/2 cup grated Parmigiano Reggiano cheese (not parmesan)


Using a food processor, chop the cashews and garlic together.

Add the basil leaves, sundried-tomatoes, oregano leaves and salt and pepper and blend together until finely chopped.

Keep the food processor running and slowly add the olive oil. Then add the Parmigiano cheese and blend until smooth. 

Store in an air tight container with a thin layer of olive oil on top to prevent browning. The pesto will keep in the refrigerator for about a week or freeze for up to 6 months. 

Notes: If you cannot find Parmigiano Reggiano cheese then use another cheese such as Pecorino Romano, Pecorino Sardo, Gana Padano or Parmesan. You can substitute the cashews with almonds. If you have whole sun-dried tomatoes I recommend to roughly chop them a bit before using them. 


Thursday, 3 July 2025

Pasta Fagioli


Pasta Fagioli translates to pasta and beans. It's rustic and hearty and consists of tiny pasta, with creamy beans and a few tender vegetables stewed in a thick rich fragrant tomato broth. What sets this dish apart from minestrone soup is, its thickness and lack of vegetables. Some recipes have regional variants with ingredients however beans and tiny pasta remain the key ingredients of this generous and abundant dish. 


Pasta Fagioli
--------------------------------------------------------------------------
Serves 8

2 tablespoons olive oil, divided
1 pound minced beef
1 cup chopped onion
1 cup diced carrots (2 medium carrots)
1 cup diced celery (2 stalks)
5 cloves garlic, crushed
4 cups low sodium beef broth
1 can (796 ml) diced tomatoes
1 can (796 ml) crushed tomatoes
1 tablespoon cider vinegar, or any vinegar
1 teaspoon sugar
1 teaspoon salt
2 tablespoons dried basil
1 teaspoon dried oregano
1 teaspoon dried thyme
2 cups uncooked ditalini pasta
1 can (596 ml) red kidney beans, rinsed and drained
1 can (596 ml) cannellini beans, rinsed and drained
shredded Romano cheese, for serving

Prep the vegetables and beans as stated in the recipe.

Heat 1 tablespoon of olive oil in a large Dutch oven over medium high heat. Add the beef; cook for 5 minutes or until the beef has browned, stirring to break up meat. Using a slotted spoon carefully transfer the cooked beef to a medium bowl; set aside. Drain fat from Dutch oven. 

Heat remaining 1 tablespoon olive oil in same Dutch oven over medium-high heat. Add onion, carrots and celery; cook and stir 5 minutes or until vegetables are tender. Add the garlic; cook and stir 1 minute. Add the cooked beef, broth, tomatoes, tomato sauce, vinegar, sugar, salt, basil, oregano and thyme; bring to a boil. Reduce heat to medium-low; cover and simmer for 30 minutes.

Add the pasta, kidney beans and cannellini beans; cook over medium heat 10 minutes or until pasta is tender, stirring frequently. Ladle into bowls. Garnish with Romano cheese.

Notes: Substitute the cannellini beans with white kidney beans or borlotti beans or navy beans. The dried herbs for fresh herbs. Another small pasta for the ditalini pasta. For more heartiness and richness try adding slices of cooked sausage or spinach to the recipe.   
  

Wednesday, 28 May 2025

Lemon Herb Pork Chops

If delicious, tender and juicy pork chops are what you are after then this is the recipe you must try. Searing the pork chops before placing them into the oven may seem unnecessary however it is worth the effort, as it makes for a tastier, flavourful chop. You may try different herbs if you wish however the thyme and lemon pair perfectly here, giving a balmy burst of summertime savour.    


Lemon Thyme Pork Chops
-----------------------------------------------------------------------------------

4 boneless pork chops, 1 inch thick and 6 - 7 ounces each
salt
ground black pepper
1 - 2 tablespoon olive oil
2 teaspoons fresh thyme leaves, chopped or dried thyme 
1 lemon, cut into wedges


Take the pork chops from the refrigerator and place on a clean cutting board or large plate. Season both sides of each chop with salt and pepper. Set aside to rest for about 30 minutes.

When you are almost ready to cook the chops, preheat the oven to 375ºF (190ºC).

Heat the oil in a large frypan over medium-high heat.

When the oil is hot and shimmery, pat the pork chops dry and add them without moving them until golden brown, about 2 to 3 minutes, on one side. While the pork sears, sprinkle half the thyme over the side of the pork chops facing up. Notes: You do not want to over crowd the chops in the frypan so sear in batches, 2 chops at a time, if your frypan cannot accommodate all of the chops at once. If the pork has a fattier edge, use tongs to hold the chops fat-side-down until they sizzle and brown slightly, about 30 seconds. 

Flip the pork so that the seared side faces up and scatter with the remaining thyme. Sear the other side for 2 minutes then transfer pork chops to an oven proof baking dish. If you are doing the chops in batches, transfer the pork chops as you go in batches to the oven proof baking dish. Once all the chops have been seared and in the baking dish, arrange the lemon wedges around the pork chops. Save the residue in the frying pan to make a glaze, see Frying Pan Glaze recipe below.  

Bake for 8 to 15 minutes or until a thermometer reads 145ºF/63ºC when inserted into the thickest part of the chop. Cooking time depends on the thickness of the pork chops and you roughly want to check after 5 minutes of cooking time. You will know when the chops are done if the juices run clear when cutting into them and they have reached the internal temperature stated above.  

Transfer the baked pork chops to a plate, cover loosely with aluminum foil and let the chops rest for about 5 minutes. Serve with the roasted lemon wedges and pan juices on top if you haven't made a glaze using the leftover brown bits from the frying pan.

Frying Pan Glaze:

When the baked pork chops are resting on the plate. Place the fry pan you used to sear the chops in, there should be some brown bits or sizzling residue left in the pan, over medium-high heat and add 1/2 cup water, 1/2 cup low sodium chicken stock, 2 teaspoons honey, 1 teaspoon low sodium soy sauce and 1 tablespoon butter. Use a wooden spoon to scrape the bottom of the fry pan so that any stuck bits come up. Bring to a simmer and cook until reduced. Taste and adjust the seasoning according to your preference, with more salt or pepper, honey or soy sauce. Take the fry pan off the heat and carefully spoon the glaze into a heat proof measuring cup for serving.   


Wednesday, 5 March 2025

Quick Bread Sticks


A basic tea biscuit recipe turned into quick rustic bread sticks that may compliment most meals and adds a modest touch while tucking into a comforting meal, a bowl of soup, as part of a sharable platter or a quick snack.     

Quick Bread Sticks
-------------------------------------------------------------------------------
makes 6 individual loaves

2 cups all purpose flour
4 teaspoons baking powder
1 teaspoon salt
1/2 cup butter 
1 cup milk

poppy seeds or sesame seeds, for decorating


Preheat oven to 350ºF (180ºC). Line a baking tray with baking parchment. Set aside.

Sift the flour, baking powder and salt together into a large bowl. Cut in the butter, small pieces work best, and using clean hands work the butter into the flour mixture until a crumbly oatmeal like texture had formed. Add the milk and stir, with either a fork or wooden spoon, to make a soft dough.

Turn dough onto a lightly floured surface and knead gently 8 to 10 times. Roll or pat to desired thickness, then cut and shape into 6 small loaves, 4 inches long and 1 1/2 inches in diameter, tapering the ends. Carefully transfer each formed bread stick onto the prepared baking tray. Brush with a slightly beaten egg and sprinkle with poppy seeds or sesame seeds and slash the tops using a sharp knife. 

Bake in the preheated oven for 35 to 40 minutes or until golden brown. Serve hot. 

Wednesday, 19 February 2025

Caramelized Apple and Leek Risotto


A celebration of seasonal ingredients and comforting flavours come together in this luxurious risotto. Dishing a delightful balance of textures and tastes with all the creamy richness of a classic risotto. The hint of sweet and savoury from the apples and fennel blends harmoniously with the leeks and goats cheese, adding layers of flavour, making this a comforting and elegant meal that's ideal for any occasion or a cozy night in. 


Caramelized Apple and Leek Risotto
-----------------------------------------------------------------------------

2 large apples, peeled and cored
1 fennel bulb, trimmed and chopped
1 tablespoon olive oil
2 tablespoons butter
Kosher salt, to taste
fresh thyme 

1 3/4 cups Arborio rice 
2 tablespoons olive oil
1 tablespoon butter
1 leek, white and light parts only, thinly sliced
1 small onion, finely chopped
3 cloves of garlic, peeled and minced
5 cups low sodium chicken or vegetable broth, warmed
2/3 cups dry white wine
6 oz of goat cheese, crumbled
fresh chopped parsley, for garnish


To make the Caramelized Apple and Fennel: 

In a large skillet over medium heat, melt the butter with the olive oil. Add the chopped apples and fennel and season with the Kosher salt. Cook over medium heat for about 20 minutes, stirring occasionally. Keeping an eye on the mixture after 10 minutes to prevent over-browning. 

Once the apple and fennel are tender and nicely golden brown, add a swish of wine, scrapping up any brown bits. Set aside.


To make the Risotto:

Clean the leek by cutting it lengthwise, then making a quarter turned slicing it again, leaving the root attached. Spread the layers and rinse under running water to remove any dirt. 

In a large frying pan, heat 2 tablespoons of olive oil over medium heat. Add the sliced leek and chopped onion. Sauté for about 5 minutes, until softened but not browned. Add the minced garlic and cook for another 2 minutes.

Stir in the Arborio rice and cook until the rice becomes translucent. Deglaze with the 2/3 cup white wine, stirring constantly until the wine is absorbed. Begin adding the warm broth, 2 - 3 ladles at a time, stirring continuously until the liquid is absorbed. Continue adding broth in this manner until the rice is el dente, about 18 - 20 minutes. When you can make a trench in the rice and it holds its shape for a few seconds, it's time to add the next ladle of broth. 

When you add the last ladle of broth, stir in the caramelized apple and fennel mixture. Cook until the stock is absorbed and the risotto is creamy and loose, like oatmeal. 

Stir in 2 tablespoons of butter until melted. Add the 6 oz of crumbled goats cheese and stir until creamy and well combined. Season with salt and pepper to taste.  Serve with chopped fresh parsley and crumbled goat cheese. 

Tuesday, 21 January 2025

Baked Fusilli with Tuscan Sausage Meat


As simple as this recipe is, it is satisfying and relatively quick to make. With minimal effort you can have a rich flavourful meal in minutes. The fusilli pasta is great for this dish as it helps to absorb and holds the chunky sauce in every bite. 


Baked Fusilli with Tuscan Sausage Meat
------------------------------------------------------------------------------
16 oz (456 g) fusilli pasta 
2 tablespoons olive oil
1 medium yellow onion, finely chopped 
4 cloves garlic, minced
1/2 teaspoon salt, divided
1/2 teaspoon black pepper
375 grams minced Tuscan style sausage meat
3 teaspoons Italian seasoning
1 can (796 ml) diced tomatoes
1 can (156 ml) tomato paste
1 and 1/2 cups grated mozzarella
1/2 cup grated Parmesan 

1 pint (284 g) grape tomatoes, cut in half

Preheat oven to 350ºF (180ºC). Lightly grease a 9 x 13 casserole dish and set aside.

In a large pot of boiling, salted water, cook the fusilli until almost tender but still firm to the bite. Drain and set it aside.

Heat the oil over medium heat in a large sauté pan, then add the onion and garlic. Season with the salt and the black pepper and cook for 10 minutes to soften the onions. Add the Tuscan style sausage meat and cook for 5 to 7 minutes, breaking and crumbling it up, the best you can, in the pan while cooking. Season the meat with the Italian seasoning. Once the meat has browned, add the diced tomatoes and tomato paste. Bring the sauce to a boil, then reduce the heat to low and simmer for 10 minutes.

Turn off the heat and add the pasta to the pan along with the mozzarella and mix everything together. Spoon the pasta into the greased casserole dish, sprinkle with the Parmesan cheese, top with the sliced grape tomatoes and bake in the preheated oven for 15 minutes to heat it through and the cheese has melted.  

Notes: you may use 2 pounds of Italian pork sausages, casing removed, if you cannot find minced sausage meat.  

Thursday, 21 November 2024

Savoury Bread Pudding


One pan dinners are pure bliss. Part of that joy, often means less prep and just a wee bit of cleanup. A flavourful and exquisite meal can be made by using a few basic kitchen staples such as eggs, butter, milk/cream, cheese and bread. A savoury bread pudding has all the comfort and spongy eggy goodness you would expect from such a substantial stodgy dish.


Savoury Bread Pudding
-------------------------------------------------------------------------------

3 - 4 tablespoon olive oil
1 medium onion, chopped
4 cloves of garlic, minced
1 package of chopped frozen spinach, thawed and drained
4 - 6 cups cubed bread
2 tablespoons herbs de Provence
1 cup shredded or crumbled cheese
6 eggs
1 cup heavy cream
1 1/2 cups 2% milk
1/4 teaspoon sweet smoked paprika
salt and pepper to taste

cherry tomatoes
extra cheese 

Preheat oven to 375ºF (190ºC).

Heat olive oil in a large frying pan and cook the onion, garlic and spinach until onion is just soft. Add the herbs de Provence to the oily vegetable mixture and toss to coat.

Toss the bread cubes in the olive oil, onion, garlic, spinach and herb mixture as best you can, not every piece needs to be coated. Place in a well oiled deep sided 9 x 13 inch rectangle baking dish. Toss with half of the cheese. 

Beat together the eggs, cream and milk. Add the paprika and a dash of salt and pepper and whisk together. Pour over the bread in the baking dish. Randomly place cherry tomatoes on top and sprinkle with the remaining cheese.

Bake for about an hour, or until browned and the cheese has melted, a knife inserted into the centre should come out clean. Place fresh springs of rosemary on top before serving. Serve with a side of lightly steamed green beans. 

Notes: Fresh spinach can be used instead of frozen spinach. 

Tuesday, 17 September 2024

Crunchy Chicken Salad


Having leftover roasted chicken went into making this flavourful crunchy chicken salad. Reminiscent of a Waldorf Salad minus the grapes. I have made a version of this when leftover turkey is abundant during certain holidays as well. This wrap and or sandwich filler is lightly creamy but fresh and crunchy thanks to the apples, walnuts and celery. Feel free to substitute what ever fruit, fresh or dried, or nuts you wish. A basic recipe where a tasty harvest of possibilities seems endless for such a classic.  


Crunchy Chicken Salad 
-------------------------------------------------------------------------------

about 2 cups leftover cooked/roasted chicken, chopped or 2 - 3 cooked chicken breasts, chopped
1/4 cup mayonnaise
1/4 cup Greek Yoghurt 
1 tablespoon grainy dijon mustard
1 - 2 teaspoon fresh or dried dill, according to taste
2 celery stalks, chopped
3 green onions, sliced
1 apple, unpeeled, cored and chopped
1/2 cup chopped walnuts, optional
salt and pepper to taste

Combine all the ingredients into a medium large bowl and mix well. Season with salt and pepper or more herbs according to taste. 

Serve over top spinach or mixed leafy greens, in a wrap, in a sandwich or tucked into a bun.

Notes: if the chicken salad appears a bit dry add either a little more mayonnaise or yoghurt or a 2 tablespoons of chicken or vegetable stock. Red onion may be used instead of the green onion.   


Wednesday, 28 August 2024

Leftovers #69 ~ Korean Keema Fried Rice


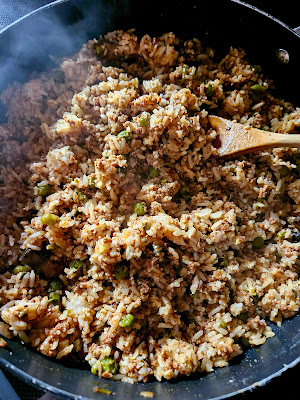
It's a rarity we have leftover Korean Keema when having it for dinner. I could have possibly made more this time as I know how enjoyable this meal is. Rather than just eat the leftovers as is, which would have been perfectly fine, I decided to make a Korean Keema egg fried rice. I didn't use any additional sauce just a bit of oil. I heated a tablespoon of oil in a frypan over medium high heat, added the leftover keema meat and gently fried until heated through. I made a well in the centre of the frypan, pushing the meat to the sides of the frypan then adding two large eggs and lightly scrambling them before incorporating them into the meat mixture. I then added the leftover rice, breaking it up and stirring to mix everything together. The spicy sauce from the seasoned meat seemed to coat everything nicely so no additional sauce was needed and when serving add some freshly grated carrots and radishes or tangy pickled vegetables. Although keema is exceptionally tasty as is, this was an enjoyable leftover variation that was greatly appreciated and may be repeated. 

Wednesday, 21 August 2024

Leftovers #68 - Chicken Teriyaki


Leftover roasted chicken can lend itself to so many reincarnated meals and teriyaki chicken is one of them. Since the meat is already cooked it gets added after the veggies, broccoli and snow peas have been lightly stir-fried, then add whatever teriyaki sauce or any stir-fry sauce you wish to use, whether it be a homemade one or a ready-made one. Allow to simmer until heated through then serve over rice. Either way this is another tasty meal that uses up leftovers.  

Monday, 19 August 2024

Food Photo of the Day ~ Dill Pickle Poutine


Poutine is another favourite of ours that has more to do with the prep than cooking. I know I am not the first person to put chopped dill pickles on poutine in fact there is a poutinerie that has done so however at times when offered and visited, they have been sold out. So I decided to try a more modest approach, my version at home. I didn't fry the dill pickles, perhaps next time. They were quartered and roughly chopped and were an instant hit. Adding a fresh tangy sharp flavour to the savoury sautéed bacon and mushrooms, salty stretchy curds, pool of traditional seasoned gravy and slices of green onion, which I forgot and put on after the photo was taken. Very scrumptious for a unique blend of flavours with an added zing.     

Thursday, 15 August 2024

Food Photo of the Day ~ Nachos


You can never have too many nachos during the warmer months as they make for a casual and relaxed dinner, if you mind the elbows. Loaded with seasoned beef and bean crumble, fresh diced tomatoes, chopped green onions, slices of black olives, fresh peppers from our garden, loads of cheese and doused with red taco sauce; these were served with sour cream, guacamole, and a tangy spicy salsa. Minimal effort, just some leisurely chopping, dicing and shredding, with a maximum piquant flavour making this one of our most inviting dinners to share.   

Thursday, 25 July 2024

Upside Down Omelette


This is what happens when you watch a few food videos and decide to try one. I can't remember where I saw it or who posted it however the premise is to cook an omelette and a tortilla together. Creating one spherical edible delight that can be rolled or cut into pieces. I don't recall what the name for this was or even if there was a name at all so I decided to call it an upside down omelette for now.  

Crack two large eggs into a bowl and whisk together with 2 tablespoons of milk and salt and pepper. Heat a nonstick frypan over medium high heat, add the eggs and when the eggs start to get bubbly and just about cooked through sprinkle with cheese and place a tortilla on top, gently press the tortilla down and let the cheese melt to secure the tortilla in place, then place a plate on top, remove from the heat and very carefully lift the pan, while holding the plate in place, you may need a pot holder as the plate will be warm and turn the frypan upside, carefully release the frypan. With the egg side right side up on the plate gently shift it back into the frypan with the tortilla side down, place the frypan back over the heat, allowing the tortilla, that's now on the bottom, to get nice and crispy golden brown. Once golden brown transfer to a plate and roll it up like a wrap or cut into triangle slices. I did add some thinly sliced red peppers and sprinkle more cheese on top before removing from the frypan and slathered on some barbeque sauce once removed and on a plate. Of course you can sprinkle some veggies, bacon or meat on top of the eggs as they cook and try different cheeses or sauces. Call it what you will... this was a straightforward and satisfying lunch that was worth the effort. 
  

Wednesday, 10 July 2024

Oven Baked Chicken Drumsticks


With very little effort or planning you can create these flavourful easy oven baked drumsticks. Exceptionally tender and juicy with a savoury sweet flavour that has a slight spicy kick. It's a recipe that can easily be doubled, just adjust the seasonings and cooking time, or made using bone-in chicken thighs and served with whatever side or sauces you wish.   


Oven Baked Chicken Drumsticks
-------------------------------------------------------------------------

1 teaspoons sweet smoked paprika
1/2 teaspoon garlic powder
1/2 teaspoon onion powder
1 tablespoon chilli powder  
1/8 teaspoon cayenne pepper
2 teaspoon dried oregano
1/2 teaspoon salt
1/2 teaspoon ground black pepper

6 chicken drumsticks
2 tablespoons olive oil

Barbeque sauce, for brushing and serving 


Preheat oven to 425ºF (220ºC). Line a baking tray with parchment paper and set aside.

In a bowl combine the sweet smoked paprika, garlic powder, onion powder, chilli powder, cayenne pepper, dried oregano, salt and ground black pepper. 

Places the drumsticks in a large bowl and drizzle the olive oil over top, toss to coat evenly in the oil, then sprinkle the prepared seasoning mix over the oiled drumsticks and toss until evenly coat with the spice mixture. 

Place the now seasoned drumsticks on the prepared baking tray with enough space between them so they are not touching. 

Place the tray into the oven and bake for about 40 minutes, or until the drumsticks reach an internal temperature of 175ºF (approximately 77ºC to 80ºC), flipping the drumsticks once half way through cooking time and brushing with barbeque sauce. Serve hot.


Notes: if doubling the recipe, do adjust the seasonings and cooking time. I baked 12 drumsticks for about 80 minutes, flipping and brushing barbeque sauce half way through and checking after 60 minutes, making sure that the internal temperature for each reached 175ºF (approximately 77ºC to 80ºC). You can try adding other herbs, seasonings or sauces according to your preference. 

Another option is... You can make a spicy herb rub by mixing the spices and oil, listed in the recipe, together then rub each chicken drumstick with the rub and place them on a preheated barbeque to cook, ensuring when the chicken is done and the internal temperature of 165ºF is reach for each drumstick. Preheat a gas grill barbeque 10 to 15 minutes on medium high heat before you begin cooking.   


Thursday, 25 April 2024

Leftovers #65 ~ Noodle Soup with Roasted Chicken and Vegetables


When there is leftover roasted chicken we usually go with the our favourite standbys when creating a meal however this time, noodle soups we craved. Full of vegetables, chunks of cooked chicken, a voluminous mound of noodles and brimming with a savoury broth is exceptionally easy to make and devour. Use whatever package noodle soup or ramen noodle soup you like, low sodium preferred, and cook according to package directions however while the noodles are simmering add chopped carrots, slices of red pepper, pieces of leftover cooked chicken, a handful of frozen peas, slices of green onion and a dash of soya sauce. When done transfer to a bowl and add a sliced hard boiled egg and sprinkle with Tajin seasoning or crushed chilies over top. A deliciously spicy full meal in minutes that uses leftover meat and vegetables perfectly.  


Wednesday, 6 March 2024

Pork Chops


I don't cook pork chops often, when I do this is my go to recipe for tender, juicy chops every time. A little to no fuss straightforward method using key savoury pantry ingredients for a tasty modest meal.  


Pork Chops
-------------------------------------------------------------------------

4 pork chops, boneless 

1 tablespoon flour
1 teaspoon chilli powder
1/2 teaspoon smoked paprika
1/2 teaspoon dried thyme
1/2 teaspoon black pepper
1 teaspoon brown sugar
2 garlic cloves crushed

1 tablespoon olive oil
1 tablespoon butter

1/2 to 3/4 cup of water or chicken stock


Season both sides of the pork chops with a light dusting of salt. Set aside on a cutting board and allow the pork chops to rest for about 30 minutes. In the mean time make the spice rub... in a bowl mix together the flour, chilli powder, smoked paprika, dried thyme, black pepper, brown sugar and crushed garlic. You can change the spices according to your preference.  

After 30 minutes, use paper towel to lightly dry the pork chops then rub both sides of the chops with the spice rub.

Heat a large frypan with the olive oil and butter over medium high heat. As it melts swirl them together and when hot, the oil should gleam and be shimmery, add the pork chops, making sure not over crowd the chops, and cook for about 3 to 4 minutes each side or until browned on both sides, searing times may vary depending on the cut or thickness of the pork chops you use, I had a standard boneless cut.     

Add the water or chicken stock to the frypan, reduce heat to low and cover and simmer for about 20 to 30 minutes, or until tender, a thermometer should read an internal temperature of 145ºF (63ºC), adding more water or stock if needed. Remove the pork chops from the frypan and place on a plate and loosely covered it with aluminum foil, allowing the chops to rest for 3 minutes, before serving. If there are any drippings left in the frypan, carefully pour or spoon into a lipped cup or bowl and serve with the pork chops as a light gravy.

Notes: I cooked eight pork chops, so the spice rub was doubled, and I did them in two batches of four, adding more butter and olive oil for the second batch. While cooking the second batch, I placed the first batch on a plate and loosely covered it with foil. When all pork chops were cooked, the first batch was returned to the pan with the other cooked chops to continue on with the recipe.
   

Thursday, 18 January 2024

Scottish Recipe Booklets


Charming and quaint as these recipe booklets are with their reproduced artwork and simplified one page recipes, an easy tourist attraction on a turnstile memento, they do offer up some wonderful traditional sample recipes to dive into. Just under fifty pages and approximately seventy-five titles available in the series making them a holiday token to gather and share. I have collected quite a few of these over the years. I know they may seem kitschy however I do seek them out and adore them all the same as a keepsake of my travels and I do reference and enjoy trying the recipes when possible. 

The recipe, Collops of Beef, is from the Favourite Scottish Recipes booklet and is traditionally served on Burns Night, January 25th.


Collops of Beef
-----------------------------------------------------------------------
Serves 4

1 1/2 lb. piece of braising steak, sliced into 4 
1 onion, chopped
6 oz. mushrooms, sliced
2 tablespoons flour
2 oz. butter
salt and freshly ground pepper
Bay leaf (optional)
3/4 pint beef stock


Set oven to 350ºF (180ºC) or Mark 4.

Mix the flour with the salt and pepper. Coat the beef slices with seasoned flour. Melt the butter in a frying pan. Fry the collops for about 2 minutes on each side. Remove from the pan and set aside. Gently fry the onion and the mushrooms. Put the onion and mushrooms and a bayleaf (if desired) into the casserole. Lay the collops on top. Pour in the stock, cover and cook for 1 and 1/2 hours. Serve with buttered mashed potatoes and a green vegetable. Rowan or red currant jelly goes well with this dish. 

Tuesday, 9 January 2024

Leftovers #64 ~ Chicken & Wild Rice Stew


Leftover over chicken and wild rice stew became a mouthwatering flaky top crust chicken pot pie. Going to a crustless bottom pie doesn't mean less appetizing, it's just more of a straightforward approach to conjuring a savoury meal using leftovers; and who doesn't want to save time creating a meal. Place leftover stew in an appropriate sized baking dish. Make your favourite pie crust recipe, like I did, or use a readymade one. Roll out the pie crust and place over the stew in the baking dish. Tucking in the edges to seal. Cut slits in the top and brush over with an egg wash. Bake in a 375ºF (190ºC) oven until the filling is bubbly and the crust is golden brown. Served with a crunchy kale salad, this became the midwinter warmer that was much needed. 

Tuesday, 12 December 2023

Chicken Paprika


The vibrancy of this sauce is marvellous and as simple as this is, it's succulent and nourishes the hungriest of souls. This dish comes together quite quickly in one pan and is an excellent recipe when you want a satisfying meal in no time. I've served this with roasted potatoes, pictured above, and mashed potatoes, with a side of green beans, not pictured due to my eagerness in wanting to take a photo. However, you may also serve this with rice, pasta or späetzle.  


Chicken Paprika
----------------------------------------------------------------------
serves 6 

4 tablespoon butter
3 tablespoons paprika
1 medium yellow onion, finely chopped
4 chicken breasts, cubed
2 teaspoons salt
1 teaspoon black pepper 
2 cups low sodium chicken broth
3 teaspoons water 
2 teaspoons cornstarch
4 tablespoons sour cream


Heat a sauté pan to medium-high heat, then add the butter to melt. Add the paprika to the pan and stir for 1 minute. Next, add the onion to the pan and cook on medium-low for 10 minutes, or until the onion is tender.

Add the chicken to the pan and season it with salt and pepper. Cook the chicken broth while scraping up any brown bits from the bottom of the pan. Bring this mixture to a quick boil, then turn the heat to low and simmer for 10 minutes, or until the chicken is fully cooked.

Combine the water and cornstarch in a cup and mix to make a smooth slurry, then immediately whisk it into the sauce. Continue to cook the sauce for 2 to 4 minutes, or until it begins to thicken, then stir in the sour cream and remove it from the heat. 


Wednesday, 8 November 2023

Food Photo of the Day ~ Baked Cheese Tortellini


Baked tortellini is always on heavy rotation in our house during the darker half of the year. I am not surprised, who can resist tortellini nestled in a thick and rich herbed tomato sauce and topped with loads of stringy melted cheese. It's a culinary comfort that is so fulfilling and a pleasure to make. 

Cook the tortellini according to package directions. Add tomato sauce, homemade or readymade, to the cooked tortellini and gently toss to coat. Place sauced tortellini in a oven proof baking dish, mine was 9x 13 inches. Top with shredded mozzarella and Parmesan cheese and bake in a preheated 350ºF (180ºC) oven for 10 to 15 minutes. Until cheese is melt and the sauce is bubbling. Turn the oven off and switch to broil and broil on high for a few minutes until the cheese is nicely golden brown and slightly crisp. Serve sprinkled with parsley.