Showing posts with label rose. Show all posts

Thursday, 13 February 2025

Chocolate Snack Cake


A snack cake that defies simplicity with its moist rich texture is impeccably moreish. The ease of this one layer cake comes from only having to use one bowl and mixing by hand. Whether decorated with icing is irrelevant as it can stand alone as is. I did sprinkle white chocolate chips on top before baking for contrast and to add an extra touch of sweetness however feel free to omit or use a different flavour of chocolate chip, if you wish. For an added decadent touch add a teaspoon of rose water along with the vanilla extract for a flavour pairing that is utterly divine. If you must over indulge with thick lashings of icing or a thin drizzle icing on top, allow the cake to completely cool before decorating. However I strongly suggest keeping it simple and serving the cake warm with a dollop of whipped cream or ice cream.    


Chocolate Snack Cake 
-----------------------------------------------------------------------

1 1/2 cups unbleached all purpose flour
3/4 cup sugar
1/3 cup baking cocoa powder
1 teaspoon baking soda
1/2 teaspoon salt
1/3 cup olive oil
1 teaspoon white vinegar
1 teaspoon vanilla extract 
1 cup cold water

1 package of white chocolate chips
culinary edible dried rose petals, for decorating, optional


Preheat oven to 350ºF (180ºC). Lightly grease and flour the bottom and sides of a square 8 x 8 x 2 inch or 9 x 9 x 2 inch cake tin. Place a piece of baking parchment on the bottom of the pan. 

In a large bowl whisk together the flour, sugar, baking soda and salt. Create a well in the centre of the flour mixture and add the oil, vinegar, vanilla. Then add the cold water and vigorously stir together, for about 1 minute until well blended and smooth, a few lumps are fine. Immediately pour into the prepared cake tin. Arrange the white chocolate chips on top.

Bake for 30 to 35 minutes or until toothpick inserted into the centre comes out clean. Cool for about 15 minutes. Sprinkle with the edible dried rose petals. Serve warm with whipped cream.

Notes: you may also use culinary edible sugared violets for decorating too. 

Thursday, 11 February 2016

Easy Chocolate Cake


No milk, no eggs and no butter. There is a video in regards to this chocolate cake floating around the internet and I wanted to give it a try. This is quite truly the simplest of cakes. You can whip it up in a cake tin, as the video suggests, however I did use a bowl. I added about 2 to 3 teaspoons of rose extract to give the cake a subtle rose flavour. I made a simple chocolate butter cream icing, to ice the cake and then decorated it with edible rose petals. Which is perfect, for a pre Valentine's Day treat. The cake itself was moist and not to heavy and had a delightful fudge taste. 


Easy Chocolate Cake
----------------------------------------
1 1/2 cups flour
3 tablespoons good quality cocoa powder
1 teaspoon baking soda
1 cup caster sugar
1/2 teaspoon kosher salt

Pre-heat the oven to 350ºF. 

Mix everything together in a round or square non-stick cake tin, until combine. ** If you are not using a non-stick cake pan then grease and flour the inside of the cake tin, both bottom and sides, then place a piece of parchment paper inside the bottom of the prepared pan. This helps to release the cake more easily and prevents sticking. 

Then create 3 wells and in each pour...

1 teaspoon white vinegar
1 teaspoon pure vanilla extract
5 tablespoons vegetable oil
1 cup of water

Blend and mix well.

Bake in a preheated 350ºF oven for 35 minutes. Allow cake to cool completely. Icing or leave plain dressed with fresh fruit. Slice and serve.  

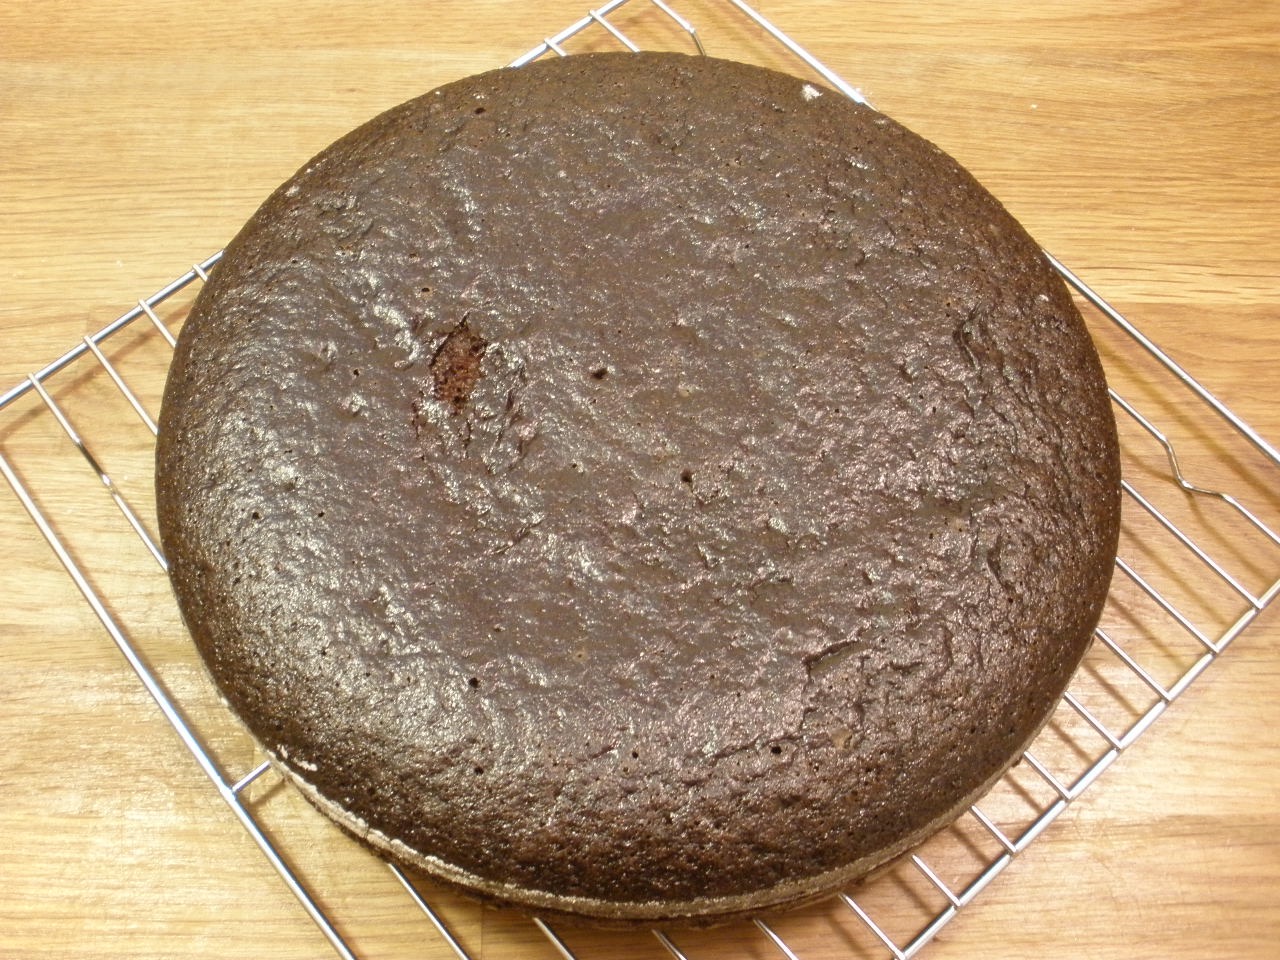
And this is what the cake looked like released from the tin. Lovely form, springy and a nice rich chocolate tone. It is perfect as is, however icing just added that finishing touch and the rose petals on top enhanced the rose flavour.  


Thursday, 10 April 2014

Coconut and Curry Butter Cookies


These cookies are absolutely delicious! The aroma as they baked was completely intoxicating. The curry gave a subtle flavour and the toasted coconut was warm and sweet. Just make sure you do not use a curry powder with garlic. After the cookies had cooled I added my own personal touch by sprinkling edible rose petals on top of them. Which despite giving them a beautiful and exotic appearance, added another layer to their delicate flavour.   


Elegant Coconut and Curry Butter Cookies (from the book Luscious Coconut Desserts)
-----------------------------------------------------------------------------------------------------------

1 1/4 cup all-purpose flour
1 cup sweetened flaked coconut, toasted
2 1/2 teaspoons curry powder (with no garlic)
1/4 teaspoon salt
1 cup (2 sticks) unsalted butter, at room temperature
1/2 cup sugar
3/4 teaspoon pure coconut extract
2 large egg yolks

1. Stir together the flour, toasted coconut, curry powder, and salt with a fork in a medium bowl.

2. Beat the butter, sugar, and coconut extract with an electric mixer in a large deep bowl, beginning on low speed and increasing to medium-high speed, until light and fluffy. Add the egg yolks and beat until will combined. Reduce the speed to low and add the flour mixture in two batches, beating just until blended. With a rubber spatula, stir in the coconut mixture.

3. If the dough is too soft, chill it for 1 hour, or until firm. Press the dough together with your hands and divide it in half. Place each half on a sheet of wax paper and form into a 7-by-1 1/2- inch log. Smooth sac log with damp fingers. Wrap the logs in wax paper and refrigerate for at least 2 hours, until thoroughly chilled and firm, or for up to 2 days.

4. Position a rack in the middle of the oven and pre-heat the oven to 400ºF. Line two large heavy baking sheets with silicone baking mats or parchment paper, or use two large nonstick baking sheets.

5. With a sharp knife, cut each log crosswise into generous 1/4- inch-thick rounds. Arrange the rounds 2 inches apart on the baking sheets.

6. Bake one sheet at a time, turning the baking sheet around halfway through, for 10-12 minutes, until the edges are golden brown. Let cool completely on the baking sheets on wire racks. The cookies can be stored in an airtight container at room temperature for up to 3 days. 

Notes: I could not find pure coconut extract so I used pure vanilla extract instead. The sugar I used was caster sugar however I wonder if using brown sugar would make a difference. I toasted the coconut in a nonstick pan on medium-high heat, stirring constantly until mostly browned. I used parchment paper to line the baking sheets. I baked the cookies for 12 minutes turning the baking sheet around at the halfway mark, 6 minutes. I only have one heavy baking sheet so making the cookies took a bit longer. Having another sheet possibly would have been handy. I noticed that the cookies did spread as they baked and therefore had a bit of a rough edge, while they were cooling on the baking sheet I trimmed the edges of the cookies with a turner spatula. I found it easier to do while the cookies were still warm. Although no decoration was needed I scattered rose petals on top for my own personal touch.

**You can make your own curry powder by mixing ground coriander, fenugreek, turmeric, cumin, black pepper, bay leaves, celery seed, nutmeg, cloves, onion, red pepper, and ginger. 

Decadent! Apart from eating them on their own, I served them with some vanilla chocolate chip ice cream. - JW   

Friday, 29 March 2013

Orange and Rose Water Scones


The new cooker arrived with much to do about nothing. Everything seems to be working fine. I decided to christen this new cooker with a batch of scones. Not just any scones, I made orange and rose water scones. They were tangy with just a hint of rose. Simply a reminder that spring is on the way. Perfect if you are looking for a break from all the Easter chocolate this weekend. I served them with cream and jam. Although rose jam or marmalade would have done very nicely, I only had rose apricot. Still they went down with great ease. 

Orange and Rose Water Scones   
-----------------------------------------

2 1/2 cups (625ml) of Unbleached Flour
2 teaspoons (10ml) baking powder
1/2 teaspoons (2ml) baking soda
1/2 teaspoon (2ml) of salt 
1 tablespoon (15ml) granulated sugar
1/2 cup (125ml) butter
2 eggs
1/2 cup (125ml) buttermilk or milk
1 tablespoon (15ml) rose water
grated rind of one orange

Preheat oven to 400ºF or 200ºC 
Combine all the dry ingredients together. Using a pastry cutter, cut in the butter until the mixture resembles coarse meal. In a smaller bowl whisk the eggs and milk together. You can grate the orange rind a head of time. Add the grated orange rind and rose water to the egg and milk mixture. Whisk to combine. 
Add the wet ingredients to the dry ingredients and stir gently with a spatula until moistened. Turn out on to a floured surface and knead just until dough holds together. Lightly pat dough to 2 cm thick and using a round cookie cutter cut into biscuit shapes. Place cut outs on a baking sheet lined with parchment paper. Brush the tops with milk and bake for 12-15 minutes. 


Friday, 15 March 2013

Rose & Violet Hot Chocolate

Last night nothing was more comforting than making a mug or two of hot chocolate. I didn't want this to be just any hot chocolate so I reached for the Fortnum and Mason's No. 38 - Rose & Violet dark chocolate bar.  


It's about 70% cocoa solids which gave it a subtle rich chocolate taste without too much sweetness and a delicate hint of rose and violet. 


On the one side it looked like an ordinary chocolate bar except for the F and M scrolled on every other square however on the backside of the bar laid sugared rose and violet petals. Fragrant and exotic all at the same time. I luved chopping this up into little bits. The chocolate and the floral fragrance floated through the air. One had to try a piece. It was a melt in your mouth treasure of aromatic proportions.     


Once the milk was in the pan, about 2 1/2 cups, the chopped chocolate bar was added. Setting the temperature to a medium heat to gently warm the milk with the chocolate. Whisking to make sure that the chocolate melted slowly. Once the milk had become chocolatey and the right temperature was reached, it was ready to pour in mugs. Smooth and creamy. Fragrant and rich with a lovely cap of foam. The hot chocolate was ready to be savoured. Stay warm and enjoy your weekend! - JW